Basic Page
The following steps will create a Basic Page.
From your menu bar, hover over "Group Actions," then, "Create Content," then click "Basic Page." A form to create the page will open.
Title

The Title field is where the title of the page is entered. The page URL is based on the page titled. The URL will be /your-group-name/the-text-entered-in-the-title-field-when-you-first-save-your-page.
If your page has a long title, but you would like the URL to be shorter, you may edit the URL in the "URL Alias" options in the right column.
Body
The Body field is where the content for the main section of your page is entered. For more details, visit our page about Basic Editing in the body field.
See Common Mistakes to Avoid for text and terminology guidelines. When referring to students, do not include their name without their written permission; rather, use ‘a sophomore English major.’

To view a larger workspace you can click the Maximize icon to see the window as a full screen.
To see the same editing options below, switch the Text format from Filtered HTML to Full HTML. The functions of the icons shown in rows 1 and 2 are listed on the Basic Editing page.
To add columns to the body field, see the Add Columns to the Body Field page.
Tags
The Tags field is used to create a feed or view of event or articles with a specific tag. Most website elements will not recognize tags on Basic Pages. You can likely ignore this field.
Media
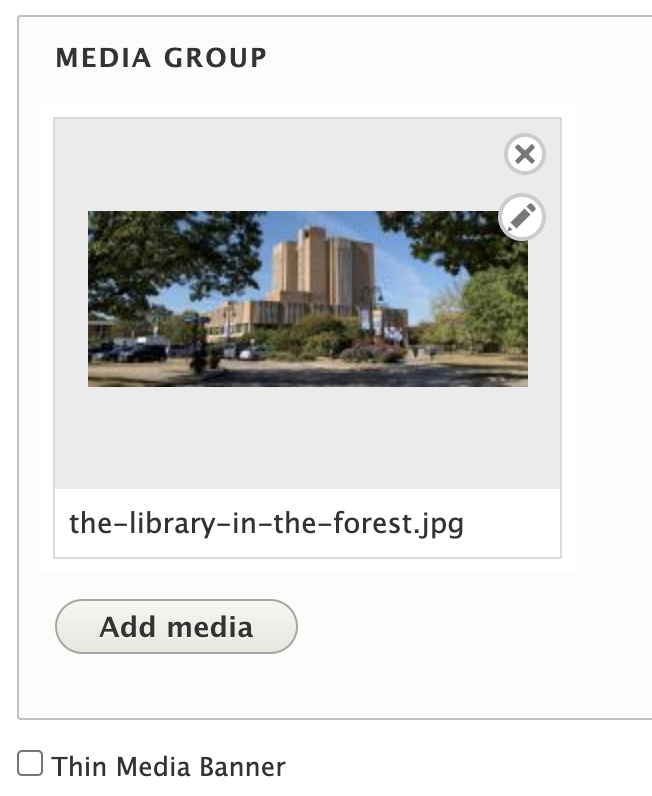
An image can be added to the media field (either uploaded or from the Media Library.) That image expands to fill the entire width of the page. (See screenshot) If more than one is added a slideshow will appear.
- If desired, a short title and subtitle can be added to the image. This image does not link to other web content. For web accessibility, the Tooltip Title Text (hover text) should not be used.
Image Requirements
- Image pixel dimension must be at least 1500x600px
- Files must be less than 1 MB
- Allowed file types: png gif jpg jpeg svg

Additionally, in the "Layout" section, you can move the header image into the left column for a more subtle approach to a hero image.
To be uploaded, a small featured image must meet these specifications:
- Images must be at least 480x480px, however you can upload a larger image and use the focal point to determine how the image is cropped
- Files must be less than 3 MB (1 MB is recommended for web accessibility)
- Allowed file types: jpg and jpeg.

To add an image:

- Select the Add Media button.
- Scroll to the top and use the "Add File" form there.
- Locate and choose the image on your computer to begin the upload process
- Enter Alternate Text as required for web accessibility compliance.
- Move the crosshairs to the focal point of the image.
- To add text to a large hero image, click the Pencil edit icon on the thumbnail and add a Short Title and/or a Subtitle to the image properties. For web accessibility, Tooltip Title Text (hover text) should not be used.
Group Audience

Your groups - The group you are signed to will be preselected. If that is the correct group the content should be added to then changes are not necessary. If it is not the correct group, select the correct group from the list of groups you are a member of.
SAVE YOUR WORK!
If you do not select the Save button, your content may not be saved when you leave the page.
